Monday, June 28, 2010

Rosemary Sand Dollar Cookies

Last year, I bought several herb plants (rosemary, mint, sage, thyme, tarragon, cilantro, and basil), and grew a little herb garden on the patio.  Several of the plants have now gotten a little too big for their planters, and a little re-potting and selective pruning was necessary.  After all the dirty work was done, I ended up with a few woody branches of fresh rosemary.  Time to make cookies, I guess!

I know it sounds kind of strange to add a savory herb like rosemary to something sweet like a cookie, but this cookie is really good! There is a subtle salty-sweet quality to the buttery shortbread-like cookie with a delicate rosemary flavor - and it pairs perfectly with a nice cup of tea, hot or cold.  And it smells so good baking...

I love the fragrance of fresh rosemary.  Translated literally, rosemary means "dew of the sea".  And that's exactly what the scent of rosemary makes me think of... ocean breezes along the Mediterranean coast.  I formed the cookie into little sand dollars (a little nod to rosemary's beachy name) - but you could easily just slice and bake them without any additions or decorations and they would turn out just as good.


Rosemary Sand Dollar Cookies:
1 1/2 c. unsalted butter
1 c. sugar
2 T. chopped rosemary
1/2 tsp. lemon extract
1/2 tsp. salt
2 3/4 c. flour
1/4 c. pine nuts
sugar for decorating


1.  Remove the rosemary leaves from the woody stems.  Then, chop the rosemary until fine.
 2.  Cream the butter and sugar until light and fluffy.
 3.  Add the chopped rosemary, salt, and lemon extract.  If you don't have any lemon extract, you can use the zest of one lemon instead.
4.  Stir in the flour.
5.  The dough will be very soft and sticky.  Place the dough onto a large rectangle of waxed paper and shape into a long log, about 3 inches in diameter.
 6.  Refrigerate the log at least 1 hour until firm.  However, the flavor of this cookie will be much more intense if you leave the log refrigerated for 2 days to let the flavors meld.

7.  Preheat the oven to 350 degrees.  Remove the log from the refrigerator, and slice into 1/4 inch slices.
8.  Place the cookies on an ungreased cookie sheet.  Press 5 pine nuts into the top of each cookie, into a star pattern.  Sprinkle each cookie with large decorating sugar crystals.
9.  Bake for 8 minutes.  The cookies will be soft and fragile when removed from the oven.  Carefully lift each cookie to a paper towel set on the counter top to cool.

Friday, June 25, 2010

Pad Thai at 2am

After grad school, I lived near Hollywood, in the area of Los Angeles know as Los Feliz.  My apartment was about 2 blocks from the William Mulholland fountain, walking distance from the Griffith Observatory and the Los Angeles Zoo, and just about a mile from Thai Town.  I got used to being able to go grocery shopping at 3am, and being able to order really good Thai food (delivery) at 2am.

Now that I live in a town that seems to shut down at 8pm, I remember those late night Thai food cravings... and how easily they were satisfied.   But what do you do when it's 8pm, you don't live near Thai Town... and a craving for Pad Thai strikes?  Lucky for me, Pad Thai is not that hard to make.  Now, this may not be "from scratch Pad Thai" that somebody's Thai grandma makes... but it's good enough to satisfy my cravings.  Most of these ingredients can be found in an Asian supermarket.

Pad Thai:
1/2 pkg rice noodles
8 oz. jar pad thai paste
1/4 c. honey
1/2 c. warm water
1 T. oil
16-18 medium shrimp
3 c. bean sprouts
2 carrots
1/2 can baby corn
5 stalks green onion
8 large shitake mushrooms
1 c. peanuts
3 eggs
1 small bunch cilantro (about 1/4 c.)
salt, pepper to taste

1.  Peel the carrots.  With a grating tool, shred long thin strips of carrot.  If you don't have an asian grating tool, you can grate the carrots instead, using the large holes on a box grater.

2. Wash the mushrooms, then slice thinly.
3. Chop a small bunch of fresh cilantro.  (Don't mind the cilantro flowers.  This bunch came out of my patio potted herb garden, and the cilantro had produced some lovely flowers.)
4.  Chop 1 c. of peanuts.  I used half regular peeled peanuts, and half Okinawa sugared peanuts.

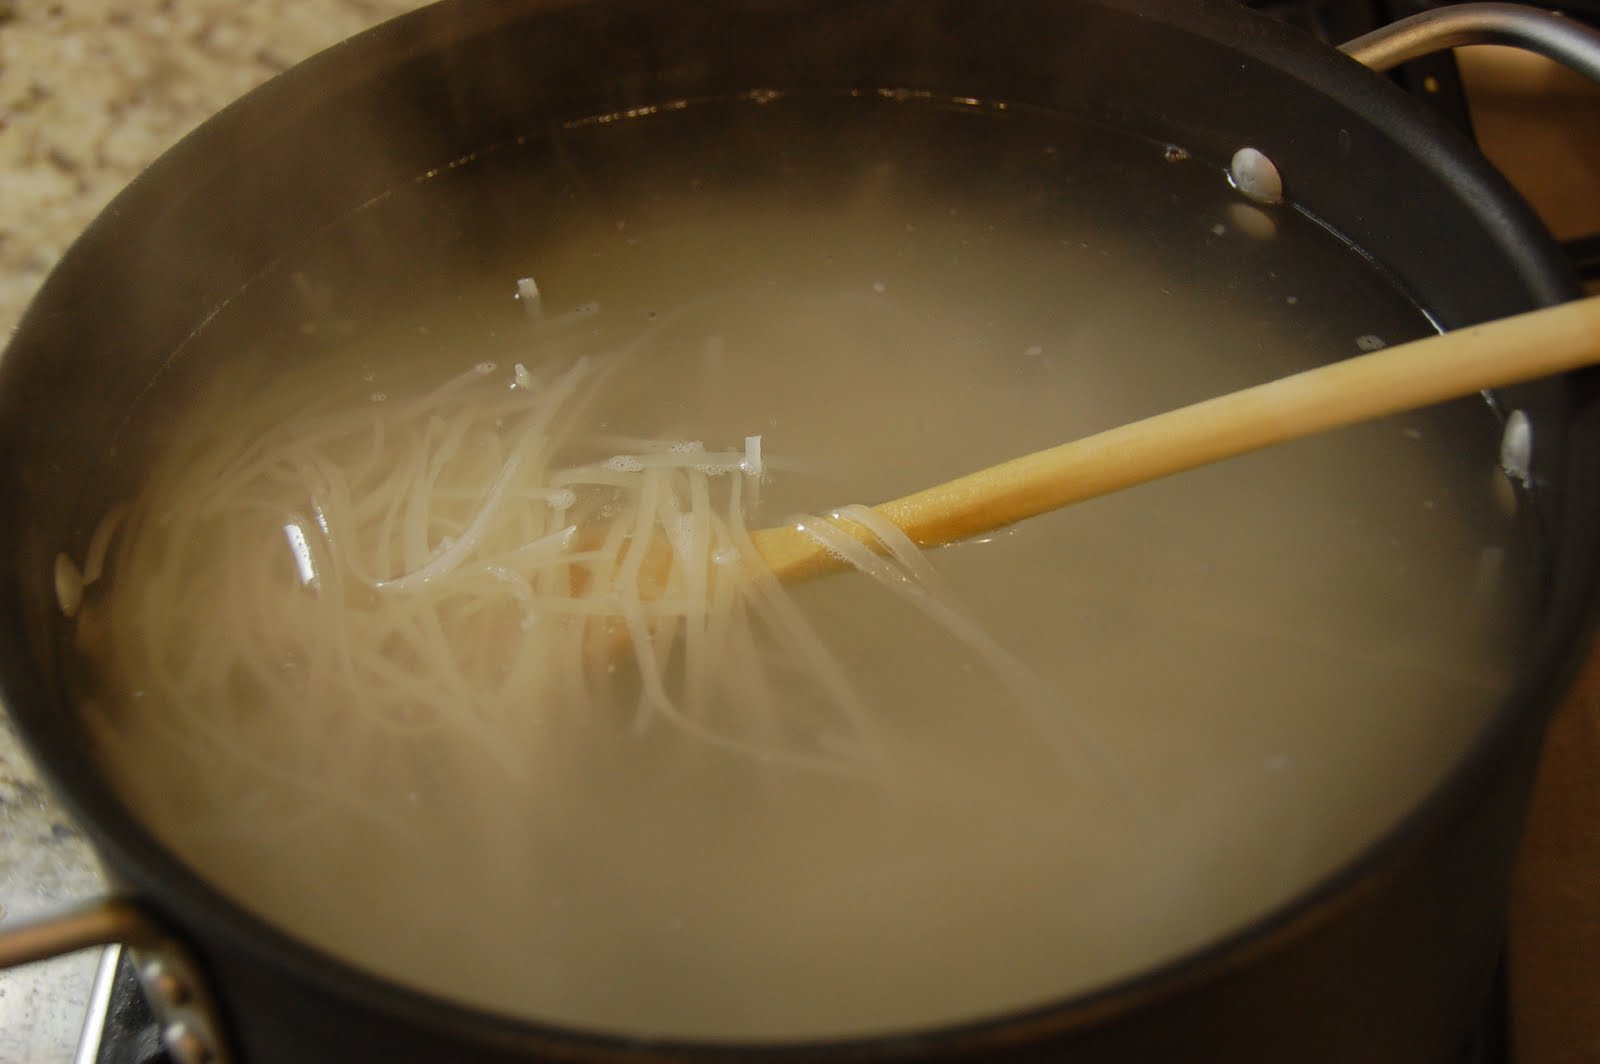
5.  While prepping the vegetables, set a large pot of water to boil.  Add the rice noodles and turn off heat.  Set a timer to 5 minutes, and allow the noodles to soak.  After 5 minutes, drain into a colander, and rinse with cold water to stop the cooking.
6. Chop the green onions, set aside.  Meanwhile slice the baby corn longitudinally into quarters.
 7. Mix the pad thai sauce, honey, and water in a small bowl.

8.  In a large wok, scramble the eggs in a small amount of oil.  Once done, set aside onto a plate.
9.  Add the remaining oil into the wok, and stir fry the shrimp.  Set aside with the eggs.
10. Stir fry the mushrooms and peanuts, add the carrots.  Season lightly with salt and pepper.
11.  Add the bean sprouts and baby corn and stir fry for 1 minute.
12.  Add the noodles, sauce mixture, cooked eggs and shrimp and stir fry 2-4 minutes.  Add the green onions and cilantro, mix, and serve.

Tuesday, June 22, 2010

Mika's Peach Pie

So as a follow up to my recipe on Peach Jam, here's another favorite peach recipe.  This pie goes really nicely with a big scoop of vanilla ice cream.


Peach Pie Filling:
4-5 c. sliced, peeled peaches
2 T. lemon juice
1/4 c. flour
1/4 c. cornstarch
1 c. sugar (+ an extra 1/2 c. of sugar if needed)
1 tsp. cinnamon
1/4 tsp. nutmeg
1/2 tsp. salt

Peach Pie Crust:
1 c. unsalted butter, 2 sticks
2 c. flour
1/2 c. wheat flour
1/2 c. cornmeal
4 T. sugar
4 T. reserved peach juices

Add-ons:
2 T. sugar for sprinkling
1 egg, beaten

1.  To peel the peaches, bring a large pot of water to a boil.  Blanch each peach for 30-45 seconds, then drop into an ice cold water bath.  The peels should easily slip off.  Remove the pits, and slice, placing the prepared peaches into a large bowl.  Once you are finished, drain off any extra peach juice, and reserve.

2.  Place all crust ingredients except peach juice into the work bowl of a food processor, pulse until the texture of cornmeal.  Add the peach juice, 1 T. at a time, pulsing each dose of juice, until the crust is moist enough to come together. Put the crust into a plastic ziploc bag, and place into the refrigerator until ready to make the pie.

3.  Combine the sliced peaches with the remaining filling ingredients, and stir to combine.  Drain off any juices.  If the peaches are sweet, then your filling is ready.  If your peaches were a little on the sour side, you might want to add an extra 1/2 c. of sugar at this point.

4.  Preheat the oven to 450 degrees.

5.  Roll out 2 pie crusts between sheets of waxed paper.

6. Line the pie pan with the first crust, then brush the bottom with the beaten egg mixture.  Add the filling to the pie crust with a slotted spoon (you want mostly the peaches, not the leftover juices from the bowl).

7.  Cover the pie with the second crust, then crimp the crusts together.  Brush the top of the crust with the egg mixture, and sprinkle with sugar.  With a knife, make several slits across the top for steam to escape during baking.

8.  Set the pie on top of a foil lined cookie sheet to catch any juices.  Bake for 10 minutes at 450 degrees.  Then, reduce the heat to 350 degrees, and bake for 45 more minutes.  Check on the pie every 10 minutes (through the window - try not to open the oven door).  If the crust edges are browning too much, cover the edges with strips of aluminum foil.

9.  Cool at least 1 hour before serving.

Monday, June 7, 2010

Island Style Mango Bread

I love mangoes.  But have you ever heard the phrase, "Your eyes are bigger than your stomach"?  Apparently, that was me.  I was at the Asian market, and bought this huge box of mangoes.  I ate about half of them within a week... but the remaining mangoes were starting to get a little too soft.

Time to make mango bread!  With the addition of coconut and macadamia nuts, this has a nice "island" flavor to it.  (That would be the Hawaiian Islands, not to be confused with the South Shetland Islands of Antarctica...)

Mango Bread:
4 c. flour
1 T. baking soda
1 tsp. baking powder
1 tsp. salt
1 T. cinnamon
1/2 tsp. ground ginger
2 c. sugar
1 c. brown sugar
3 T. vanilla extract
1 c. canola oil
1/2 c. plain yogurt
6 eggs
4 c. chopped mangoes
2/3 c. chopped macadamia nuts
1 c. flaked coconut

1.  Preheat the oven to 350 degrees and grease and flour 2 loaf pans.  (This time I was feeling a little lazy, and instead of using my metal loaf pans, I just sprayed my two silicone loaf pans with non-stick spray.)

2.  Sift the flour, baking soda, baking powder, salt, and spices in a large bowl.

3.  Combine the sugars, vanilla, oil, yogurt, and eggs in another bowl.  Mix thoroughly.

4.  Slice the mangoes, remove the skin, and chop the fruit into small pieces.  I used about 6 small mangoes to get about 4 c. of chopped mango.

5.  Dump the wet ingredients into the dry, and mix until just combined.

6.  Fold the mangoes, macadamia nuts, and coconut into the batter.

7.  Divide the batter between the two loaf pans, and sprinkle with sugar or decorating sugar.

8.  Bake at 350 degrees for about 1 hour and 5 minutes.  Remove and cool for 5 minutes on a wire rack before inverting.  Cool completely before wrapping with plastic wrap to store.

Friday, June 4, 2010

Preventing Macular Degeneration with Carrot Cake

Sometimes I feel like eating cake.  The problem is, I seldom want to stop eating cake.  The twisted solution in my mind, of course, is to make a cake that is somewhat healthy (in the attempt to make me feel better about over-indulging in dessert).

Carrots are a good source of Vitamin A and Beta-Carotene, essential for macular health (so are the eggs in this recipe, which contain lutein and zeaxanthin).  Plus, the cream cheese frosting has calcium.  And hey - walnuts are a good source of alpha-linolenic acid, a type of omega-3 fatty acid that is also found in fish.  And last, don't forget about the cinnamon which contains water-soluble polyphenolic polymers (derived from the antioxidant catechins) that have shown to decrease fasting blood sugar levels and drop blood cholesterol/triglyceride levels.

Why take vitamins when you can just eat them in the form of carrot cake?   This isn't dessert - this is health food!


Carrot Cake:
2 c. finely grated carrots
1 c. brown sugar
1 c. sugar
1 1/2 c. canola oil
4 eggs
1 tsp. salt
1 tsp. vanilla
2 3/4 c. flour
2 tsp. baking powder
2 tsp. baking soda
2 tsp. cinnamon
1 tsp. nutmeg
1/2 tsp. ground cloves
1/2 - 1 c. walnuts, chopped
1/2 c. golden raisins (optional)

1.  Preheat oven to 350 degrees, grease and flour two 9 inch round cake pans, lining the bottoms with parchment paper.


2.  Combine carrots, brown sugar, sugar, oil, eggs, salt, and vanilla.  Mix until thoroughly combined.

3.  Sift flour, baking powder, baking soda, and spices.

4.  Dump wet ingredients into dry, and gently mix until just combined.  Stir in nuts and raisins, taking care not to over-mix.

5.  Divide the batter evenly between the two pans, and bake for approximately 25 minutes until done.


6.  Cool 5 minutes before inverting onto a wire rack.  Remove parchment paper carefully and allow to cool for several hours.  Frost when completely cooled.


Cream Cheese Frosting:
8 oz. package cream cheese
1 stick unsalted butter (1/2 c.)
~2 cups powdered sugar
1 tsp. vanilla
1/2 tsp salt

1.  Cream room temperature butter and cream cheese with salt and vanilla.  Slowly add in about 2 cups of powdered sugar - more or less depending on the desired consistency.

2.  Frost the cake once completely cooled.  Start by placing the first layer onto a plate.  Spread approximately 1 - 1 1/2 cups frosting evenly across the top before adding the second layer.  Spread the remaining frosting across the sides and top and decorate with finely chopped walnuts.